Midiboy Software Guide
Midiboy comes with ATmega328P processor with a bootloader preinstalled. It allows uploading new user software without a need for any additional tools apart from a USB-B cable and a computer.
The board is set up to be compatible with Arduino IDE which makes Midiboy programming a breeze!
Download and Install
First, let’s setup the Arduino IDE, find the download page here. Recommended version is 1.8.9 or newer. Older versions may not work well with the steps outlined in this guide. Check out the Getting Started for detailed install guides.
Add Midiboy Board
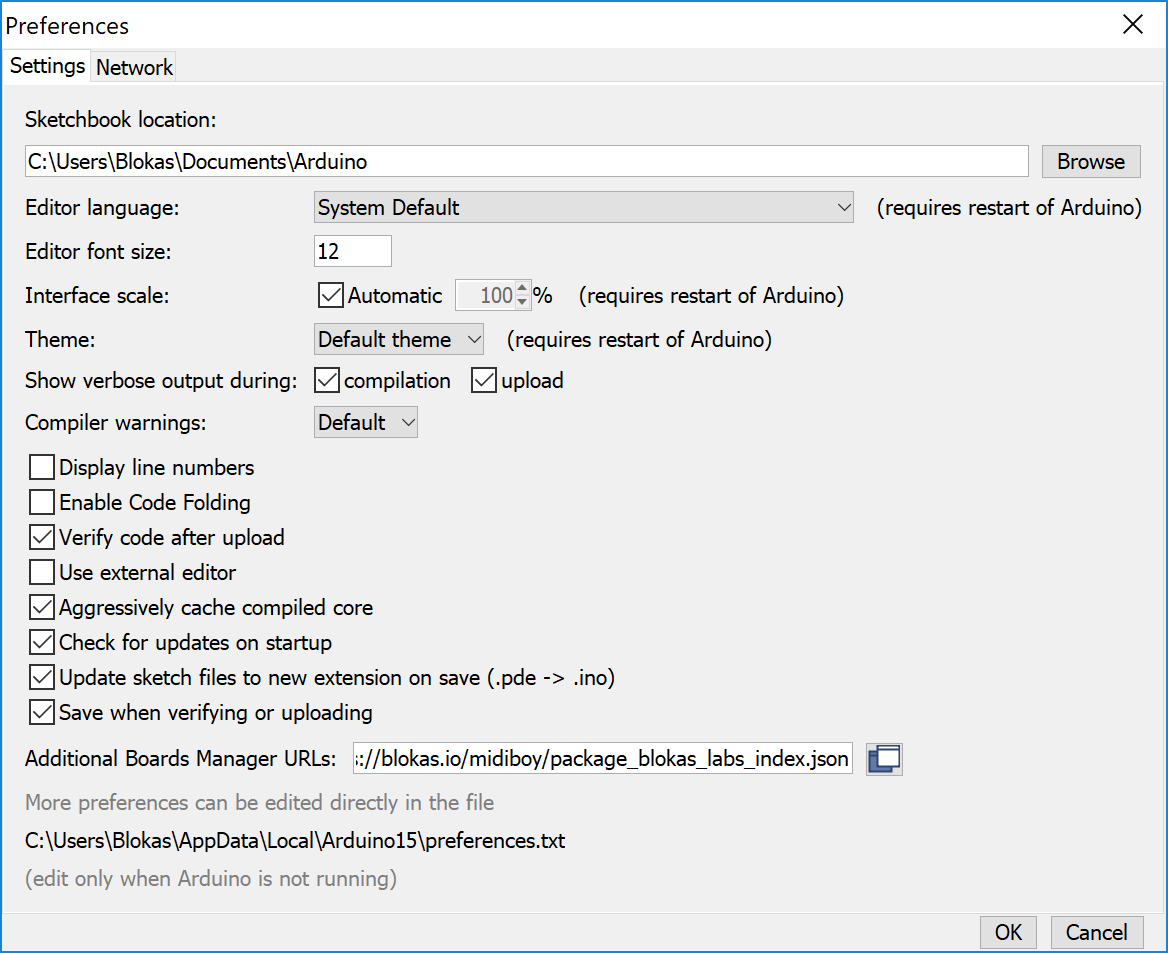
Now we’ll add the board definition files for Midiboy. Launch Arduino IDE, go to File→Preferences (Arduino→Preferences on Mac OS), enter the following value into ‘Additional Boards Manager URLs’:
https://blokas.io/midiboy/package_blokas_labs_index.json
It is a comma-separated list, the button on the right of the input box opens the field editor.
While you’re in preferences window, we’d recommend enabling “Show verbose output during” for both “compilation” and “upload”. It will make Arduino IDE show detailed information for building and uploading, making troubleshooting easier.
Then go to Tools→Board: “…”→Boards Manager. Wait a bit for Arduino to download the latest packages, then using the text box at the top, search for ‘Blokas’, it should show up like this:
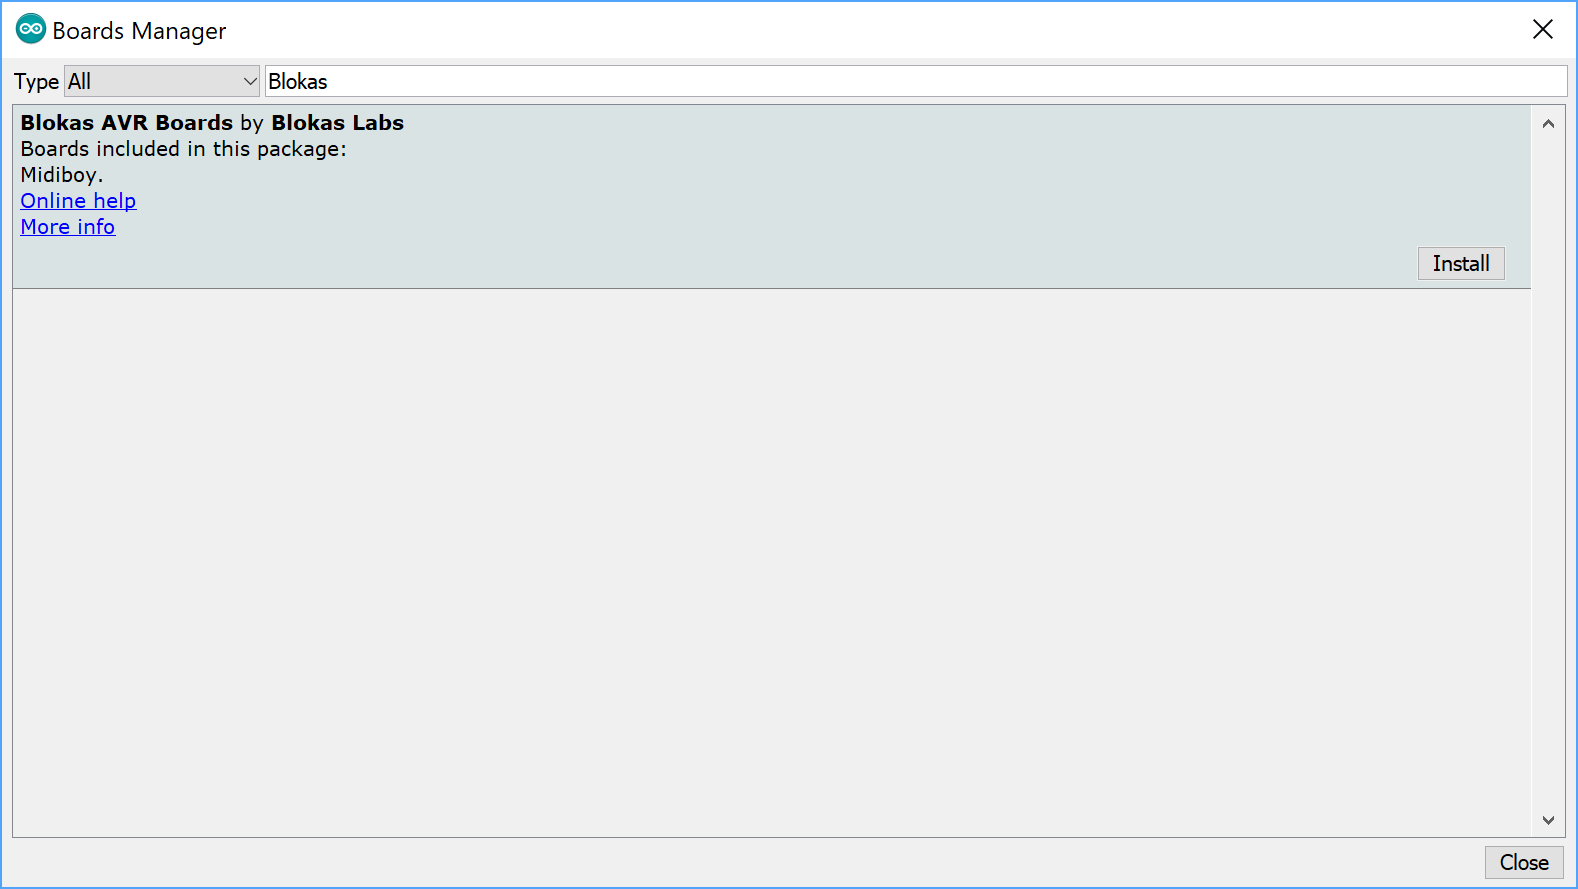
Hit Install. (In case the button is not visible, click on the black colored text). After the install is complete, hit Close.
Select the Midiboy Board, Programmer Type and Port
Now go to Tools→Board: “…” and select Midiboy. Then go to Tools→Programmer: “…” and select USBasp. Even though it’s not required for USBasp programming,
some Port may have to be selected in the Tools menu, so just pick any that is listed (e.g. COM3). If Port menu item is disabled, that's fine. In case you work with
more kinds of boards, you’ll have to ensure that the correct Board and Programmer are set for when you’re using Midiboy board.
OS Specific Setup Steps
Windows
If you attempt programming Midiboy and get an error like avrdude.exe: error: could not find USB device "USBasp" with vid=0x16c0 pid=0x5dc,
even though Midiboy is in Bootloader mode, connected, and appears in the Device Manager, it may be necessary to install an alternative driver for it.
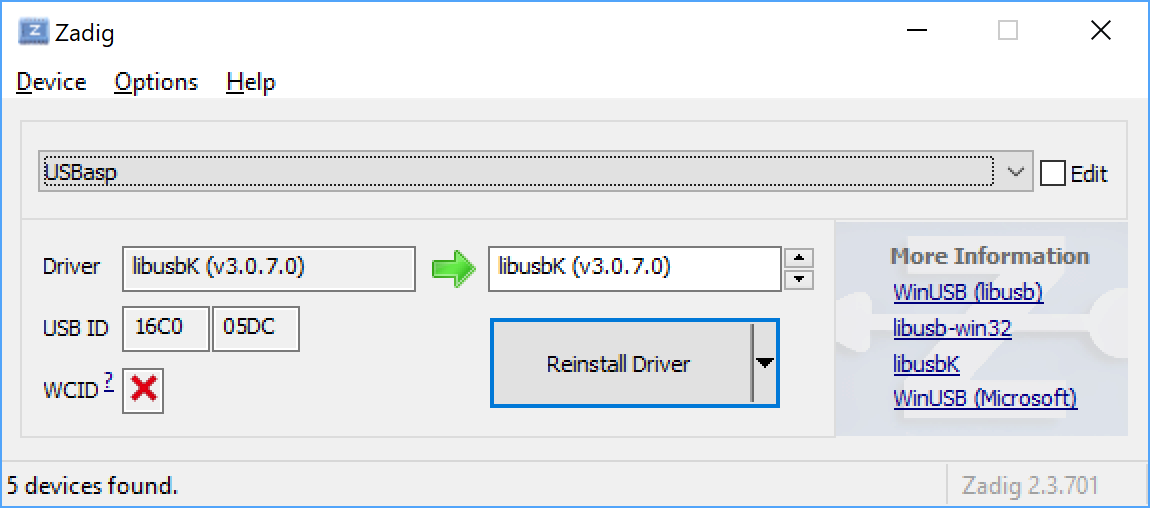
To do so, we are going to use the Zadig tool:
- Run Zadig.
- Select 'USBasp' in the dropdown. (You may have to enable the 'List All Devices' checkbox in Options menu).
- Select libusbK.
- Click Replace Driver.
- After completion, programming via Arduino IDE should now work.
Make sure you have 'USBasp' programmer selected in the Tools menu.
Linux
On Linux, by default, only the root user can access the USBasp device. So in order to be able to run Arduino IDE as a regular user and flash Midiboy,
we'll add a udev rule to grant regular users access to the device.
Run this single-line command to create a /etc/udev/rules.d/99-Midiboy.rules file.
echo 'SUBSYSTEM=="usb", ENV{DEVTYPE}=="usb_device", ATTRS{idVendor}=="16c0", ATTRS{idProduct}=="05dc", MODE="0666"' | sudo tee /etc/udev/rules.d/99-Midiboy.rules
To verify, try printing the file contents:
cat /etc/udev/rules.d/99-Midiboy.rules
The contents of the file should be:
SUBSYSTEM=="usb", ENV{DEVTYPE}=="usb_device", ATTRS{idVendor}=="16c0", ATTRS{idProduct}=="05dc", MODE="0666"
And finally, let's restart the udev service:
sudo systemctl restart udev
Now after unplugging and plugging Midiboy back in, it should be usable with Arduino IDE running as a regular user. Make sure you have 'USBasp' programmer selected in the Tools menu.
Mac OS
No known additional steps are required. If you hit any obstacles, let us know in our community forum! Make sure you have 'USBasp' programmer selected in the Tools menu.
Uploading Sketches
Now that the Arduino IDE is set up, you are ready to upload some code to Midiboy: Uploading Arduino Sketches