Projects Using Pisound
Internet Radio Station
Using icecast and darkice you can easily setup your own radio station and broadcast whatever is connected to the Pisound input!
First let's get the required software installed:
sudo apt-get install icecast2 darkice
Save the below contents to /etc/darkice.cfg
# this section describes general aspects of the live streaming session
[general]
duration      = 0                # duration of encoding, in seconds. 0 means forever
bufferSecs    = 2                # size of internal slip buffer, in seconds
reconnect     = yes              # reconnect to the server(s) if disconnected

# this section describes the audio input that will be streamed
[input]
device        = hw:1,0           # Alsa soundcard device for the audio input
sampleRate    = 48000            # sample rate in Hz. try 48000, 96000 or 192000
bitsPerSample = 16               # bits per sample. try 16
channel       = 2                # channels. 1 = mono, 2 = stereo.
                                 # Only stereo mode is supported by Pisound.

# this section describes a streaming connection to an IceCast2 server
# there may be up to 8 of these sections, named [icecast2-0] ... [icecast2-7]
# these can be mixed with [icecast-x] and [shoutcast-x] sections
[icecast2-0]
bitrateMode   = cbr              # variable bit rate
bitrate       = 128
format        = mp3              # format of the stream: mp3
quality       = 0.8              # quality of the stream sent to the server
server        = localhost        # host name of the server
port          = 8000             # port of the IceCast2 server, usually 8000
password      = hackme           # source password to the IceCast2 server
mountPoint    = pisound          # mount point of this stream on the IceCast2 server
name          = pisound          # name of the stream
description   = DarkIce on Pisound # description of the stream
url           = http://localhost # URL related to the stream
genre         = my genre         # genre of the stream
public        = no               # advertise this stream?
#localDumpFile = recording.mp3   # Record also to a file
And finally, execute 'darkice' in a terminal or using Alt+F2:
darkice
In case you're getting DarkIce: TcpSocket.cpp:251: connect error [111] error, see below for a workaround.
Then from other devices you can connect to http://raspberrypi_ip:8000/ to see generic information about the station and http://raspberry_ip:8000/pisound to listen. (Replace raspberrypi_ip in the URLs using the IP of the Raspberry Pi)
For your station to be reachable outside of your local network, you need to have an externally accessible IP address provided by your ISP and you need to configure port forwarding on your router to forward requests on some port to port 8000 on Raspberry Pi. However, this is out of scope for this guide, there should be plenty of info around on how to set that up.
connect error [111] Workaround
Edit /etc/default/icecast2:
sudo nano /etc/default/icecast2
Change 'ENABLE=false' to 'ENABLE=true' at the bottom, note the comment above, it suggests to change the password in another config file to be different from 'hackme', remember to change it in /etc/darkice.cfg too.
Then run:
sudo systemctl restart icecast2
After this, darkice should launch successfully.
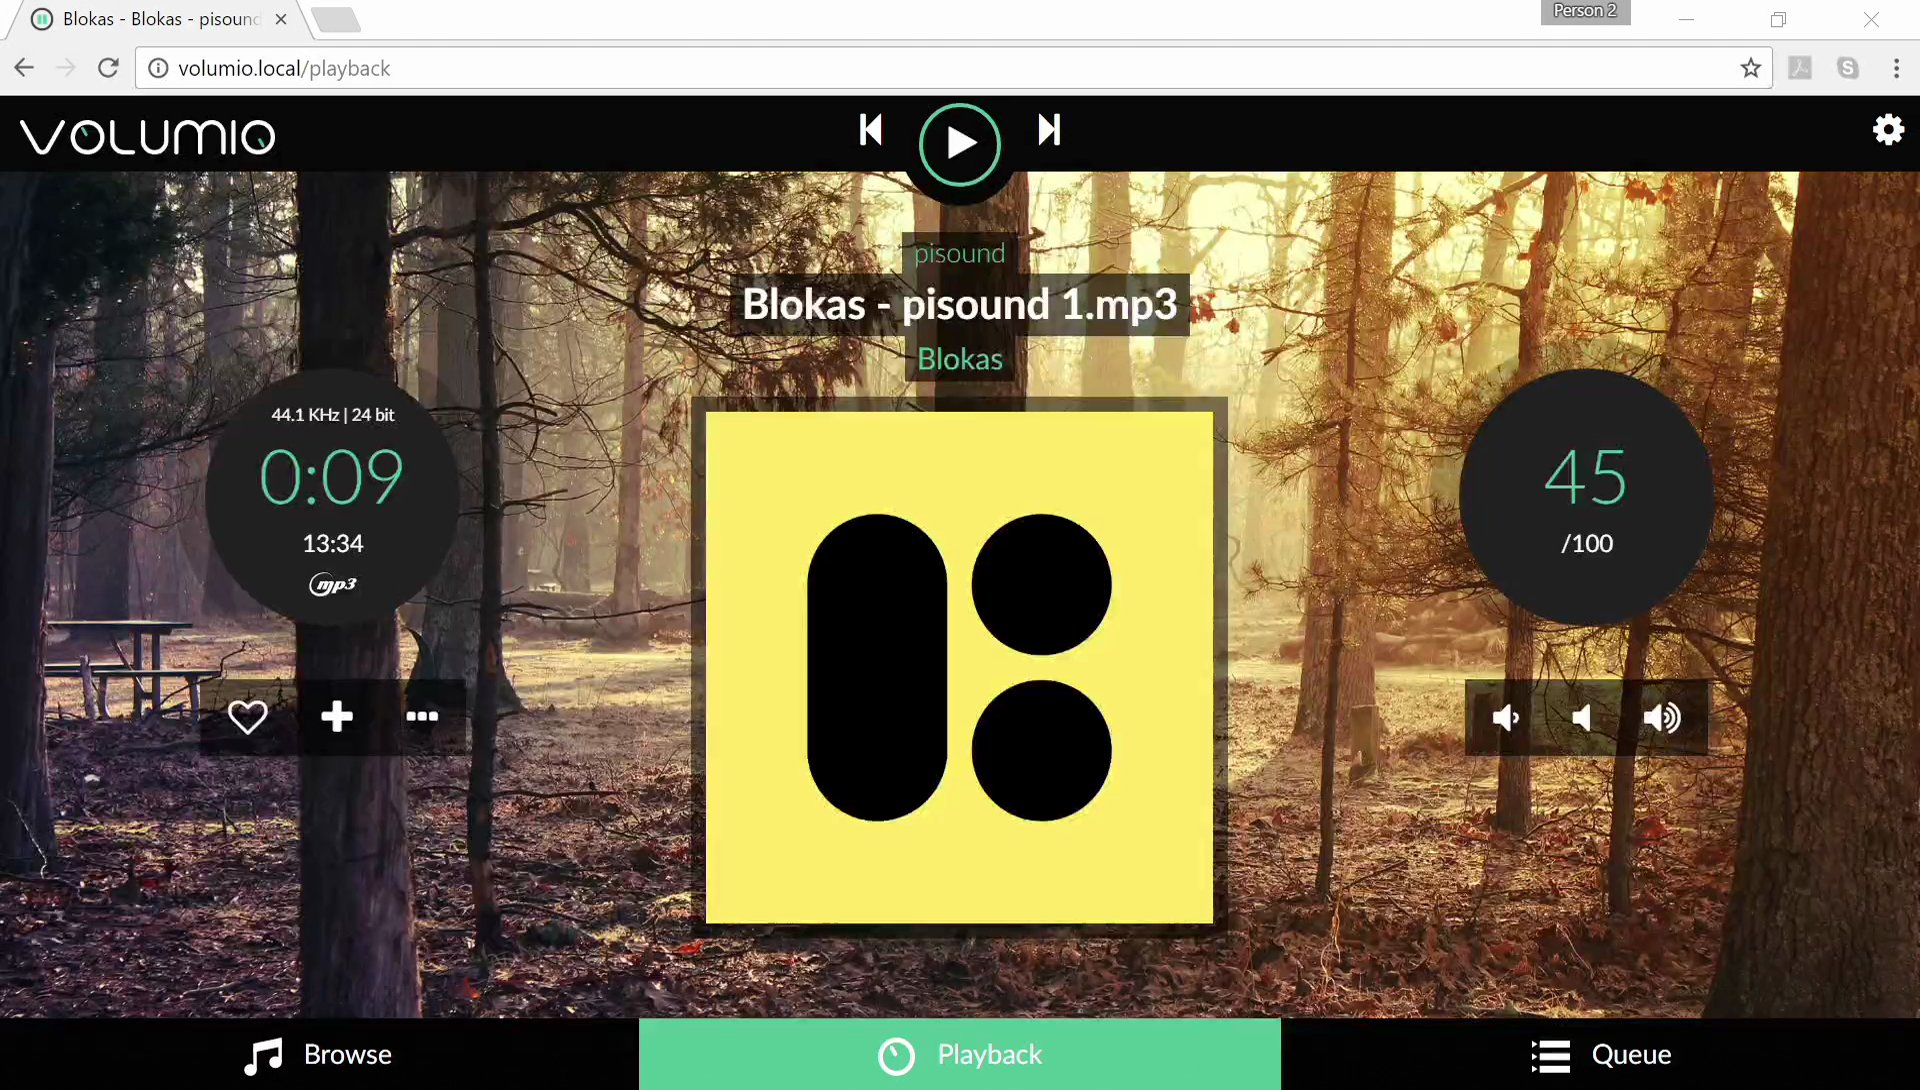
Network Enabled Hi-Fi Player
You can use Pisound with Volumio! Since version 2.129 (25-03-2017), Pisound's module is integrated into Volumio, so installing the latest version or updating should be enough to get 'Pisound' listed in Playback Options. Just enable I2S DACs, pick Pisound and save the configuration! We recommend switching the mixer to 'Software', if you want to control the volume within Volumio. You can use 'Hardware' mixer if using the physical volume control on Pisound.
Now you can enjoy using Pisound as a network media player!
Pisound with DIY MIDI Controller
If you want to add more controls to your Pisound audio projects, you can make your own MIDI controller using a couple of potentiometers, push buttons and any Arduino compatible board that uses ATmega32U4 microcontroller. Alternatively, it should be straightforward to adapt the example code to use DIN-5 MIDI ports, as the USBMIDI API interface is compatible with Serial API.
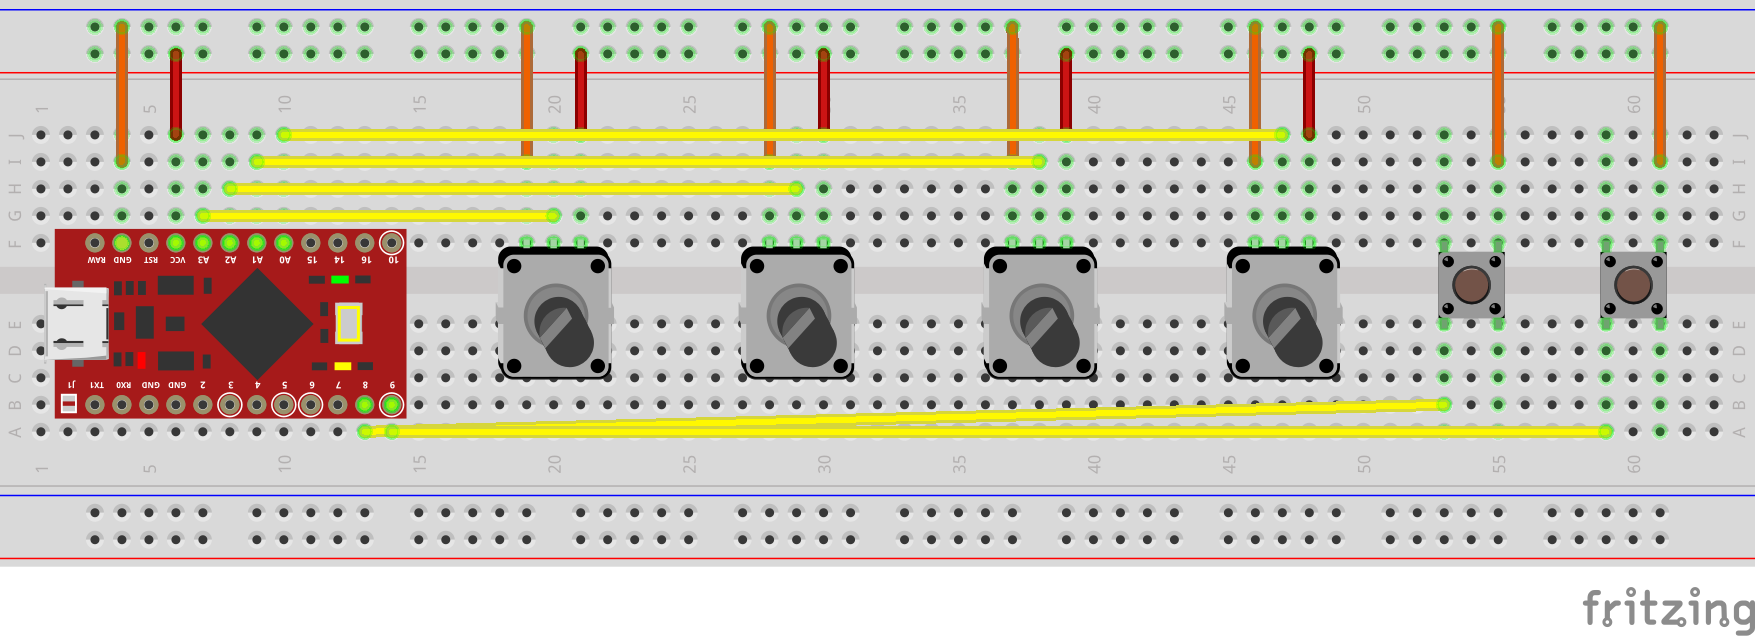
Go here for full instructions.
Pisound and LV2 Plugins
Unfortunately the rpi.autostatic.com repository used in this guide seems to be no longer available.
On http://rpi.autostatic.com/ repository you can find some cool software packages for audio. One of those is Carla - a host for LV2 plugins.
So let's give it a go.
First we have to add the repository to apt-get:
wget -q -O - http://rpi.autostatic.com/autostatic.gpg.key | sudo apt-key add -
sudo wget -q -O /etc/apt/sources.list.d/autostatic-audio-raspbian.list http://rpi.autostatic.com/autostatic-audio-raspbian.list
sudo apt-get update
sudo apt-get install carla jackd qjackctl
Configure it in Setup... like so:
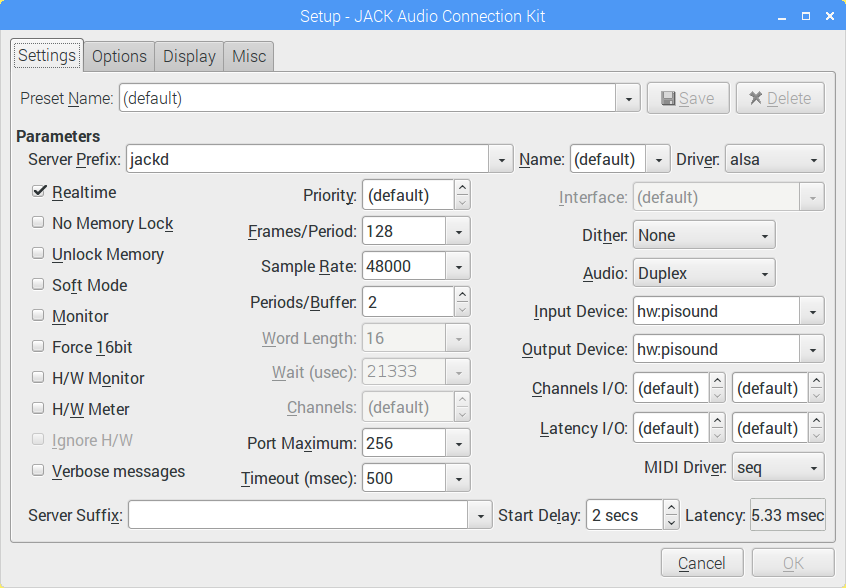
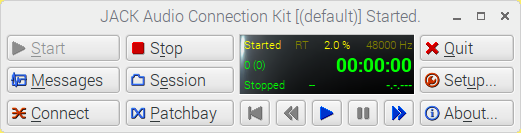
And start the jack server by pressing Start:
Now run Carla (Alt+F2, carla, enter)
Click Configure Carla and make sure that Audio Driver is set to JACK. It will connect to the already started Jack server. For process mode I've used Single Client, but you can use any option you like.
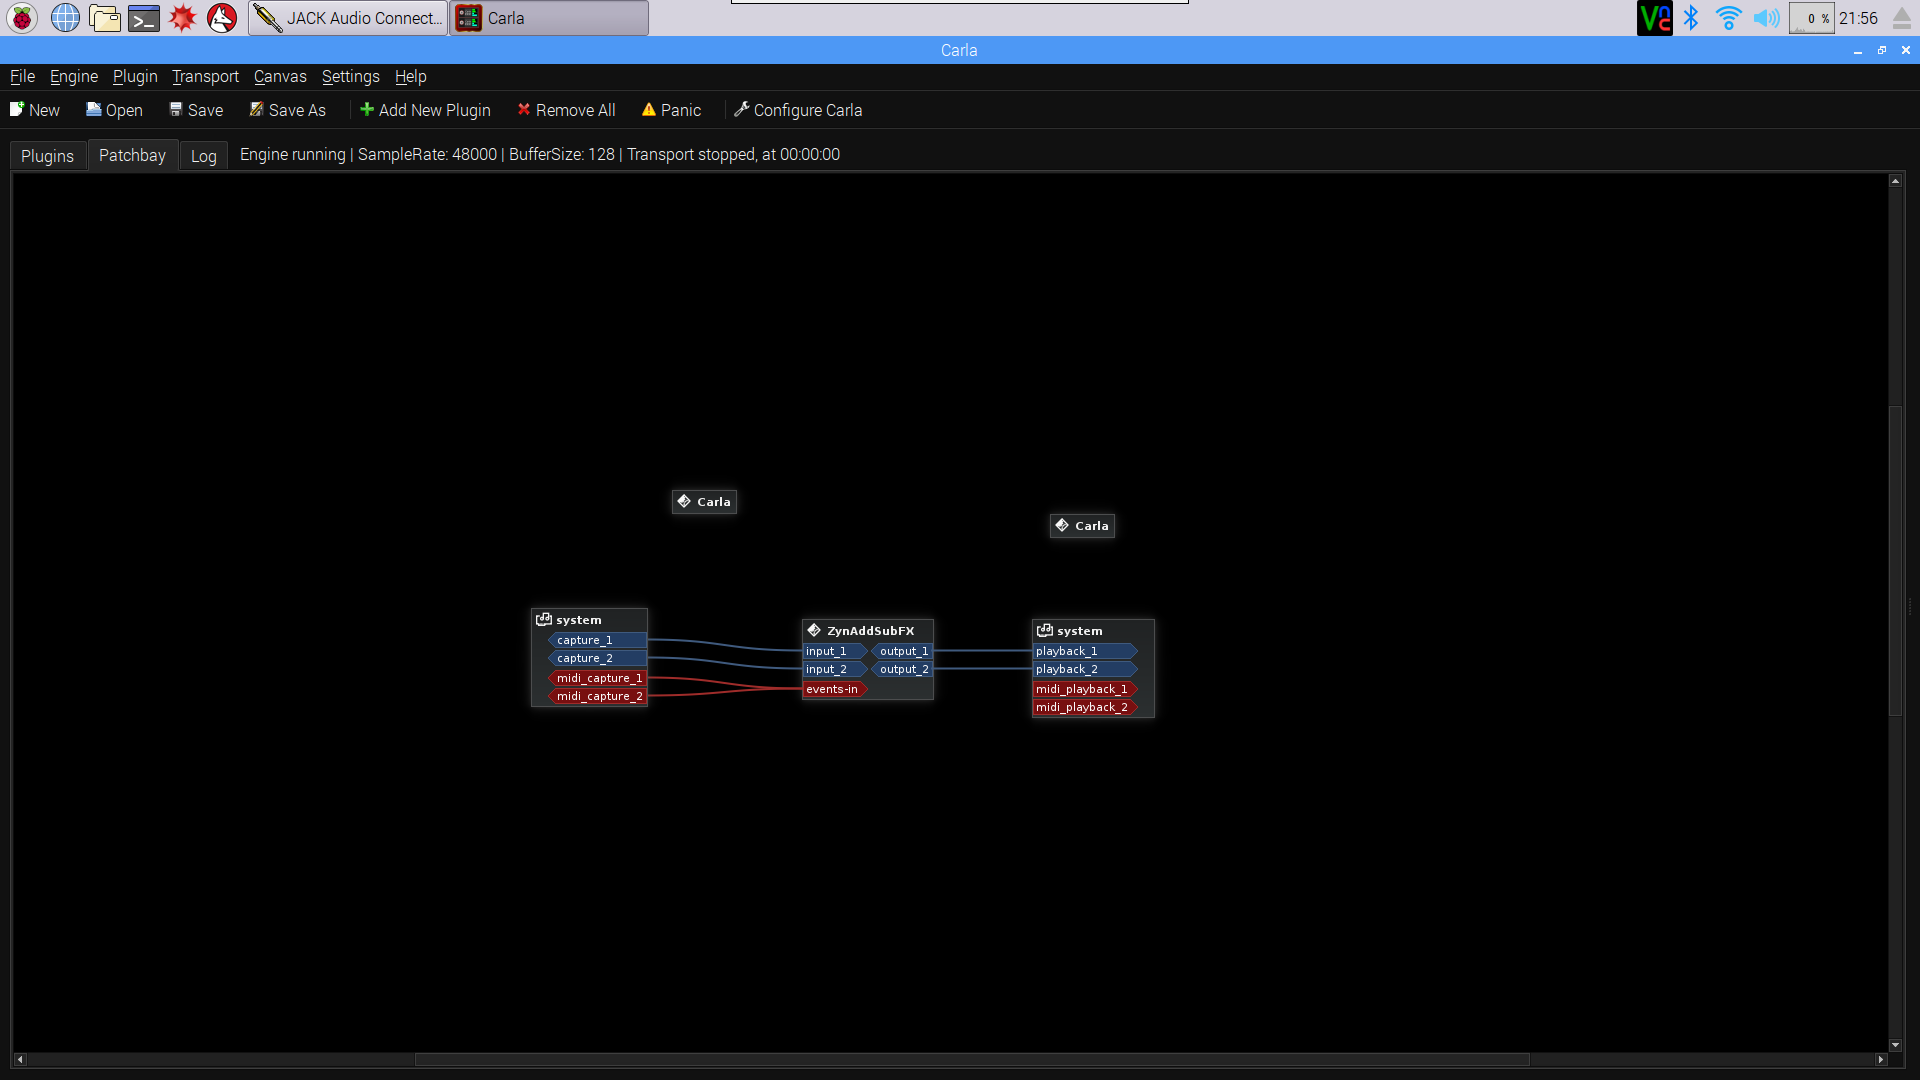
Then you can add plugins in Plugins section, and patch them up in Patch Bay section.
The top screenshot shows ZSynAddSubFX connected to Pisound's Input and Output, as well as MIDI data routed to the synth plugin.
There's a couple of plugins readily available to play around within Carla, and you should be able to find more LV2 plugins built for Raspberry Pi to experiment with on the Internet.
Comments & Questions
For more tips & tricks join our community forums! 👋If you have any questions about the information on this page let us know below! 👇